 Decide the direction of the flooring after laying the moisture-retaining barrier and mattress in the floating system laminated flooring application. After shaving the short male side in the first row, start placing it from the left corner, with the female side facing the wall. Put the end panel on the previous one and measure the place where you will cut the male side against the wall. 8 mm from the point where the panels coincide. Adjust the last piece by cutting it around shorter. The last piece should not be shorter than 5 cm.
After setting the expansion gaps, join the panels by gluing the short edges and install the first row. During this process, be very careful that the panels follow each other exactly. This is extremely important, especially in the first place. Apply the glue to the inside of the female side.
Continue the next row, starting with the remainder of the last panel. Use plastic wedges to snap the panels together. When making the last row, place the panels on the previous row, with the male end facing the wall. With a full width leftover, mark the distance and slide it along the wall to mark the entire last row in this way. Cut the panels from this point to set the last row. Apply the glue in the same way and mount them together. Use a pull-out bar to ensure complete cohesion.
Of course, do not forget to leave an expansion gap during the assembly of the last row. Here, after the floating system laminated parquet application is completely finished, remove the elements you use to adjust the expansion gap and install the baseboards. Never fix the skirting board to the parquet.
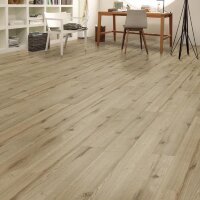
Wooden Parquet Prices
Wooden parquet flooring cost will vary according to the properties of the material and floor to be used.
